
Hi Friends!
Way back in April when I went on retreat, a class was being conducted for the One Block Wonder quilt. I had never seen them and was instantly intrigued! I knew I had to try one so I signed up this Summer for the class.
The class met twice. The first class was in June and we learned how to cut our fabric. Over the summer we sewed and sewed and sewed our blocks together and returned just recently for our second class. The second class was putting our blocks up on the design wall.
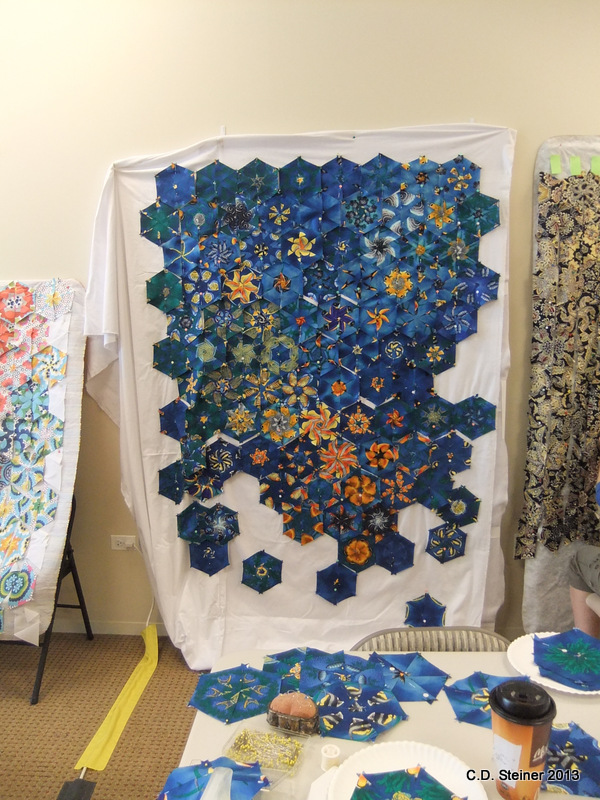
This took a long time! I would put up several blocks and tweek the placement only to discover something else wasn’t working for me in the composition. So more tweaking ensued. So on and so on! Pretty much ALL DAY (or at least 3 or so hours). Then when I got to a point that I thought looked good I stopped…
This was it! Everything then was rolled up and I now have all the pieces here at home. This will be a good on going project for me this winter. I really love this technique, and just like my really funky new wood floor, I can just get lost in all the crazy swirl and color of the quilt!
Have any of you made a One Block Wonder quilt? If so, please share your link! I’d love to see them, they are so cool!
This fabric is fish btw! Can you make out the little ‘Nemo’s’?
Happy Quilting!
~Cathy

I made one of these last year, and I want to “offer advice” if you won’t mind.
First; here is my post – http://stitchinggrandma.wordpress.com/one-block-wonder-quilt/
I have lots of photo’s on facebook, https://www.facebook.com/photo.php?fbid=10153200632195094&set=a.192305510093.254830.73173250093&type=1&theater#!/photo.php?fbid=423031367716972&set=a.113415728678539.12040.100000303379453&type=3&theater
if you can’t open them, let me know and I will add you as a friend.
I was tutored by my sister-in-law. One thing she had me do is get a stack of tiny post it notes. EVERY piece on the design wall got a letter & number. So; I made a stack of tags and made sure they stayed on the piece all through the process. I used a letter for each “column” and a number on each row. This helped with any “confusion” once the pieces were going back and forth to the sewing machine.
These quilts can not take a lot of torque in the washing machine, so if you plan to wash it; make sure you heavily quilt. The one I made got washed and I had pieces PULLING apart. The setting on the washer, along with the way it was handled was a disaster. I had not quilted it, but “tied” it. I took it completely apart and reworked parts of the piecing, and reassembled. Let me tell you, I was absolutely sick. BUT … I learned along the way that I needed to SHORTEN my stitch length when joining my pieces on this pattern. I also quilted all over in a tight Free Motion manner. The end result is, the quilt has been in steady use since last fall; and my granddaughter spent lots of time on the floor with it! I made it quite large, so it will fit her bed for a long time.
YES; I would do another on. My sister-in-law makes these all the time.
So; when you wash, use a front loader. Gentle cycle, low speed spin and cross your fingers. ( I believe a quilt is made to be used, and when you have a child using it, it will need washed!). Oh; mine was fish also!
You have inspired me to post the story on my blog; so I will copy this comment and use it.
Enjoy the one block wonder…it WAS fun to make; and REALLY; I will do another.
Mary…..aka stitchinggrandma
LikeLike
Thank you Mary! Those are EXCELLENT tips! I love that OBW you made…see? this is why I am so in love with these, they are all different and all so cool to see the transformation!
I will definitely think about the quilting aspect. It will be awhile before I get there but heavy quilting will be in order!
LikeLike
I love it!
MOM
LikeLike