

Hi Friends!
As I’ve been working on these ‘Back to Square One’ blocks I’ve been writing up this tutorial and paper pattern pieces…so first things first.
Here is the pattern: Back to Square One Block r1
This is a combo-pieced pattern using Paper Piecing for the Flying Geese blocks, Paper Foundation Piecing for the String Triangles and Traditional Piecing to sew the parts together. The paper pattern printout contains the foundations for both the flying geese and the string blocks as well as a pattern piece for the center square. The second page is just optional as you’ll see I use phone book paper (gasp! — yes…I used a paper pattern to make a string block…but I’ll get to that in a bit) and you can just cut those out of phone book paper. The center square can also be rotary cut, it is a 2-1/2″ square.
To make the Flying Geese Segments:

Start by working the area of the pattern marked with the number 1.
Layer a DARK scrap of fabric RIGHT SIDES TOGETHER with a LIGHT scrap of fabric. Position these two so that the DARK is against the BACK of the paper pattern at the position marked on the paper with a 1. Double check to make sure both the dark fabric and the light fabric will completely cover area 1…
With the PRINTED side up, sew across the horizontal line under the 1…
Do this for the remaining 3 segments.
*****This next sequence continues for the remainder of the segment, for all 4 flying geese sections.*******
Fold back along the seam you just sewed and trim off any excess fabric. Try to trim slightly less than a 1/4 inch seam allowance (these are small pieces so it helps to clear out as much bulk as possible.)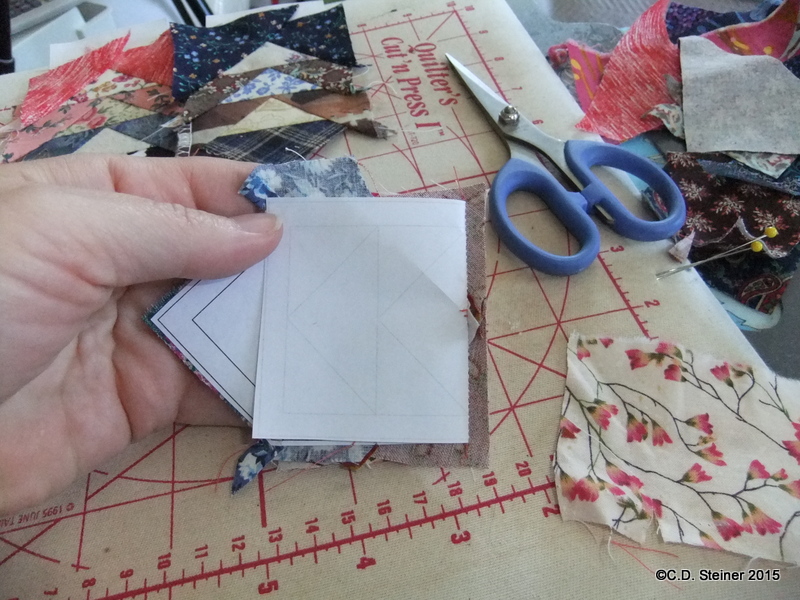
Press up the LIGHT fabric…
Turn the segment over and peel back and crease the paper along one edge of the triangle…
Trim, same as you did before, giving yourself a seam allowance no more than a 1/4″. Just use scissors. The pieces are small and it’s easy to get the job done with one a clean snip of the scissors…

This is what it looks like from the right side. A big triangle has been cut away (above) which if big enough could be used again, but I find I can toss much of these snips as they are too small for anything else.
Now do the same on the other side of the triangle. Fold on the line, crease and trim the other side of the triangle…

Here is the trimmed triangle center of the next flying geese! It is ready for the wings!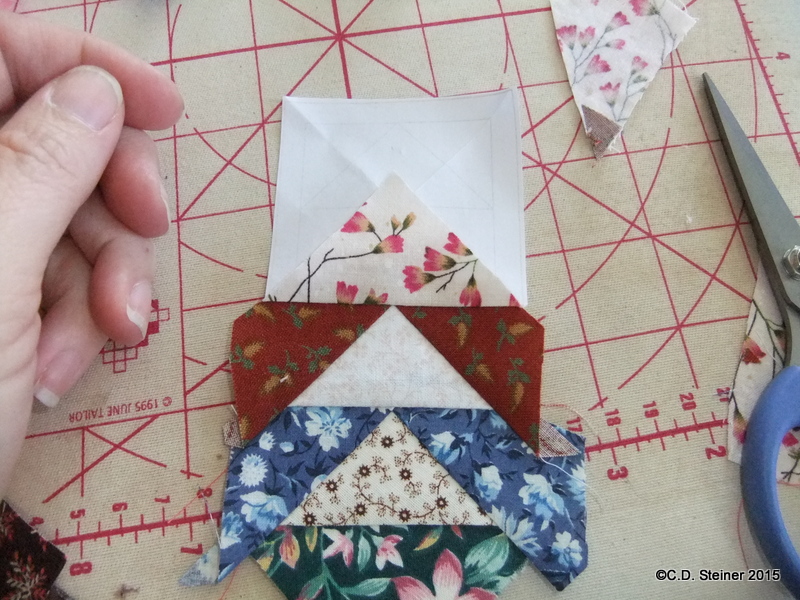
Having a trimmed edge now makes it easier to get the wings lined up…
For the wing portion, select fabric large enough to cover BOTH the right side and the left side. Here, I’ve chosen a scrap, which just so happens to be a larger triangle leftover from a project. It is a perfect size to cut into 2 units (smaller triangles). You don’t have to use triangles. Rectangles work perfectly well too, just something big enough to cover that area of the paper pattern.

I use one of wing triangles and position it against the trimmed edge of my body triangle…
I hold in place with my fingers, flip it over and stitch along the wing sewing line…
Stopping just past the horizontal line and into the next unit. (just one or two stitches)…
Continue to sew the other segments in a chain and remove the unit. Press up the wing. Check the seam allowance and trim if necessary. Usually you shouldn’t have to if you’ve lined up a straight edge against that body triangle edge. 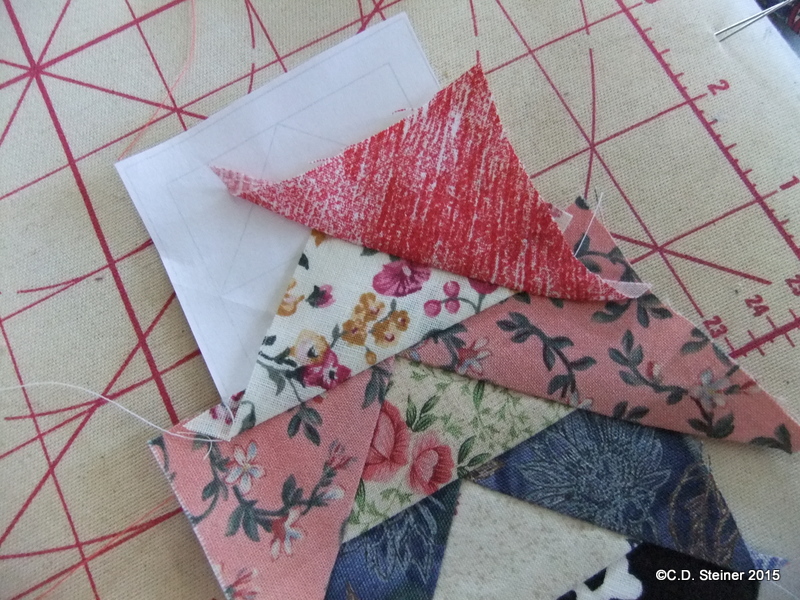
Next, place the other wing against the body and sew this in place… 
Trim if necessary and press! 
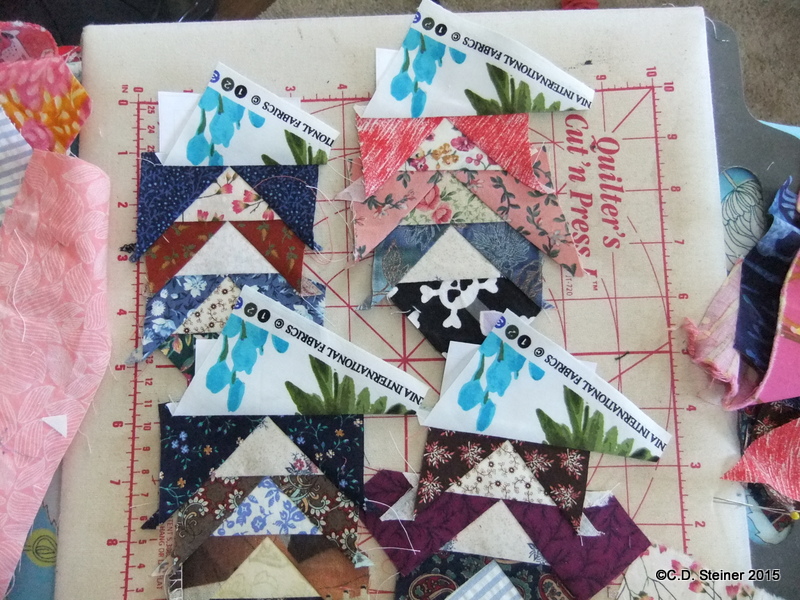
Continue in this manner until the last flying geese unit… 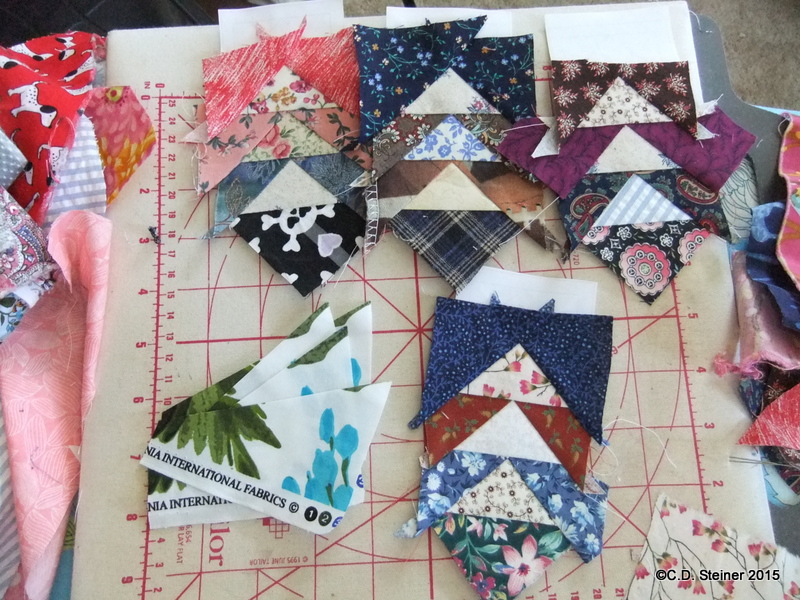
For the last round of flying geese make all the units the same, using the same fabrics (this is of course optional, but I found that having all the same fabric helped to punch up the center star when the block is sewn together). For the Body of the geese on this block I’ve pulled out some scrap from a One Block Wonder quilt (graciously given to me by my friend Ellen). I thought there was enough ‘white’ space in these small chunks to act as a neutral…
For the wings, I’ve cut apart a 2-1/2″ scrap strip into 8 smaller triangular units…
String piece the whole process, just as we did before…

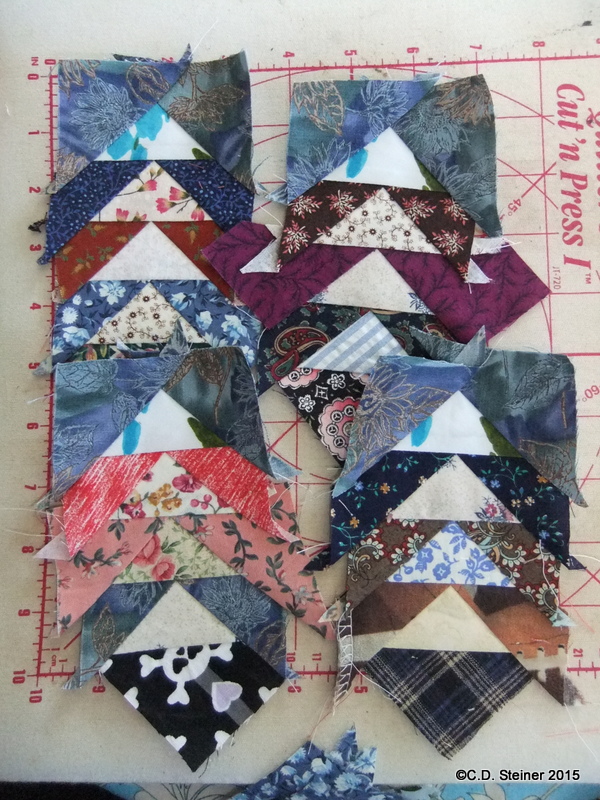
Trim
Press…
And lastly, remove paper!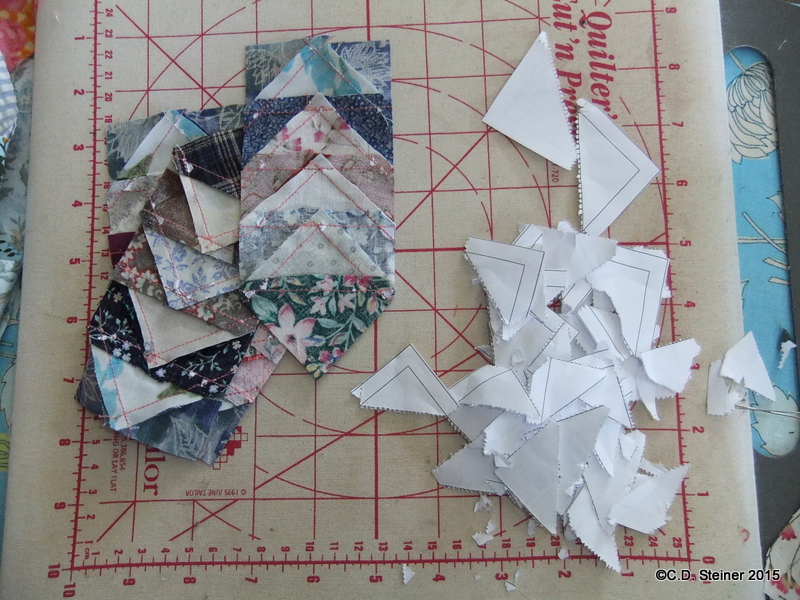
That completes these flying geese units! We are ready for Part 2 – The String Blocks!
Isn’t this fun? Just think of how much scrap you can get rid of using this segment!!! I love it!
Part 2 is next!
Happy Quilting, Happy Sewing!
~Cathy

You must be logged in to post a comment.