
Here are a couple of pictures of one of my readers’ restored Singer 201. When I wrote my blog post “Why a Singer 201 will always be a favorite” way back in 2008 I had no idea that I’d have so many people comment on that post and share their own love for these old beauties.
It brings me great joy to see what you all have done!
Here is one that I’d like to share with you all and it comes from Dwasifar. He writes…
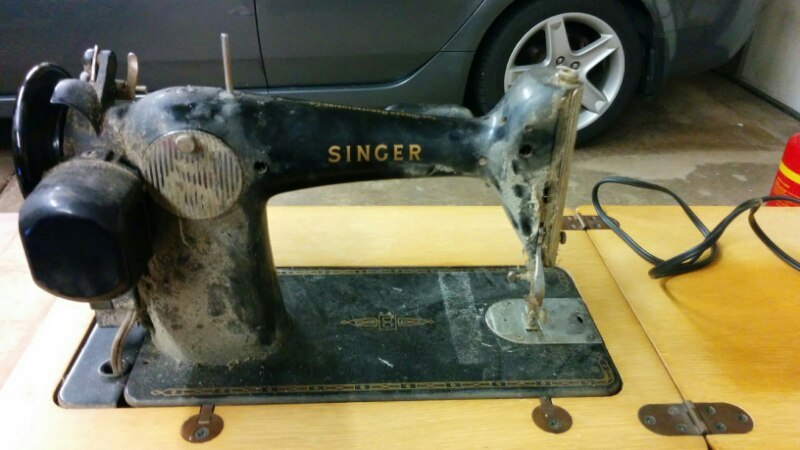
“Yesterday my wife and I were at a thrift store, looking for something else entirely, when we came across an old sewing machine in a blond wood cabinet marked $30. The owner said, “Furniture’s 25% off today, and I guess that’s furniture, if you’re interested.” So I forked over $22.50 and into the car it went.
It was covered with dirt and crud, with surface rust on the foot and needle shafts, but I figured what the hell, I can see what it’ll do. She already has a near-mint 1968 Touch & Sew that we got the same way, so I figured it was worth the gamble.
Once we got it home I looked closely at it. Model 201, with a serial number that worked out to 1957 manufacture. It would barely run at first, but it was trying hard. So I cleaned up the outside, read the manual, opened it up, and did a lot of careful cleaning and oiling. The surface rust came off the metal parts with a little 00 steel wool and some polishing with a piece of jute twine. The internal mechanicals looked clean, some of them almost new. The motor brushes looked good (although I did crack one of the plastic brush caps and had to epoxy it back together). Even the light worked.
After about 90 minutes of cleaning, oiling, and reassembly, I plugged it in, pressed the pedal, and WHIRRRRRRRR away it went, as if 57 years had not actually elapsed since it rolled off the Singer line.
I put a new needle on it and turned it over to my wife; she threaded it up (after a couple of false starts) and after a little bit of tension adjustment it was sewing perfectly, quietly, and FAST.
Now I have to clean up the cabinet. That’ll take longer. But apparently this is quite the find. She’s really happy and excited about her “new” old Singer. I’m happy I brought it back to life, but from what I’m reading here, that has a lot more to do with Singer’s engineering than anything I did.”
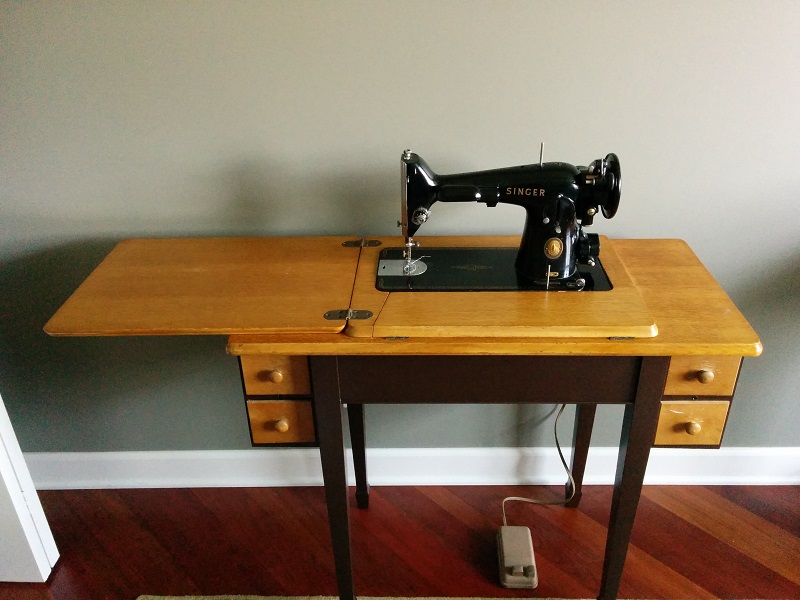
And here is his beauty all spiffed up. I love his restoration on the cabinet, don’t you?
Regarding the cabinet, Dwasifar mentions …
” The cabinet was pretty much trashed by time and neglect, with the finish flaking off and a lot of sun fade, so I wasn’t really worried about ruining it, which let me be more aggressive than I might be with a piece of fine furniture.
I sanded all the old finish off the top, except for the edges; I left the original enamel on those, because it covers the edges of the veneer. I gave it two coats of stain and six coats of satin polyurethane to make a tough and durable work surface. The base is made of cheaper wood and was not really practical to refinish, so instead it got three coats of dark brown satin enamel for a contrasting appearance. I left the drawer fronts alone for now; the color match to the newly refinished top is pretty close.
It’s not perfect – you can see wear and old damage in the edges and painted areas if you look closely. But it’s way better than it was, and the wear gives it character.”
I love it! Great job Dwasifar and thanks for sharing! I hope you get many years of use out of your 201!
To read more about the 201, the comment section of that post is still open and I share it publicly…you can read it HERE. Enjoy!
Happy Sewing, Happy Quilting, Happy Restoring!
~Cathy

Thanks for posting this. I’m actually pretty happy with how it turned out. I had no particular expectations when we bought it, so it feels really good to have it turn out to be not only functional but attractive too. I feel like we won the lottery.
Regarding “many years of use” – after seeing how this thing is built, I don’t doubt it. It looks impossible to kill. The mechanical components are the highest quality I’ve ever seen in a consumer product, and the engineering is visibly just as robust. I can’t think of a single consumer-channel device of any kind built to this standard today. I can think of some things I WISH were this well-built. Cars, for example, or laundry machines.
If I could buy products of this quality today, I’d feel confident I’d never have to buy another one of whatever it is. But I guess there’s not enough profit in that, so we get disposables from China instead. My wife also has a new Janome – a fine machine by modern standards, fast and smooth and quiet, but I have a hard time imagining that 57 years from now it will be anywhere but in a landfill. But I’ll bet the 201 will still be operational.
LikeLike
Your are right about the Janome. I think most of the plastic cased machines these days will not withstand the test of time. The plastics will break down, turn color and/or any type of computer chip or circuit board in them will stop working.
LikeLike
There’s no reason the electronic pieces couldn’t be designed to last, or at least to be replaceable. They just don’t do it that way. When they come out with new models every couple of years, there’s no reason to make repair parts for each of those short-lived models for very long. And of course the machines have to be more mechanically complex to support all the stitches the computer is telling them to do, which means all that extra machinery has to be made cheaper or nobody could afford to buy it. I gather that is why Singer stopped making the 201 after decades in production – it cost too much to build to that standard. We have a Model 648 too, built about 7 years after the last 201, and although it’s got a metal case, and a lot more built-in features than the 201, you can see where the compromises were made to get it in at an affordable price.
I’m thinking of trying to hack the Janome, actually. It’s a DC1018, and from what I understand it’s mechanically identical to the DC1050 except with only 18 stitches instead of 50. That means the other 32 stitches are in firmware, and there’s got to be a way to flash them in or something.
LikeLike
Well, I do get why they are manufactured the way they are. You are sooooo beyond my own technical expertise with the hack. Sounds like fun though!
LikeLike
I would guess this might have been used in a school clothing class. The cabinet was a typical model found in many sewing classrooms in the 1960s and 1970s. When our school building was remodeled in the mid 1980s many of these cabinets (most with the machines still inside) ended up in various locations as side tables; the nurse’s office had one in the lobby to hold various brochures.
The sewing classes meanwhile went with portable sewing machines. These were stored on the counter when not in use and the large tables could be used for classwork–as well as sewing and cutting.
LikeLike
We found a variety of personal effects in the drawers – a bag of buttons, a dime, a plastic Sunbeam thimble, some woven cotton strap material, a stack of stickers of angels and dolphins, a snap plier (with snaps) still in its packaging, and an amateurishly-sewn handmade zipper pouch. The snap plier and stickers clearly date from the 1980s. All this suggests the machine might have been last used by a school-age girl, but if it came right from the school I’d imagine none of that stuff would have stayed with it. Perhaps it was purchased from the school by a student at the end of a school year.
LikeLike
Beautiful!! I don’t have the wherewithall or space to keep mine–but I do have a 1957 201 model I am trying to sell!!!
LikeLike
Did you sell it?
LikeLike
And yes, I did buy mine originally at a school sale, so I’m sure it was a home-ec machine.
LikeLike