
Hi Everyone!
This is a super quickie project. One I’ve had on the brain for a while but just this morning decided to do. Headphone covers! 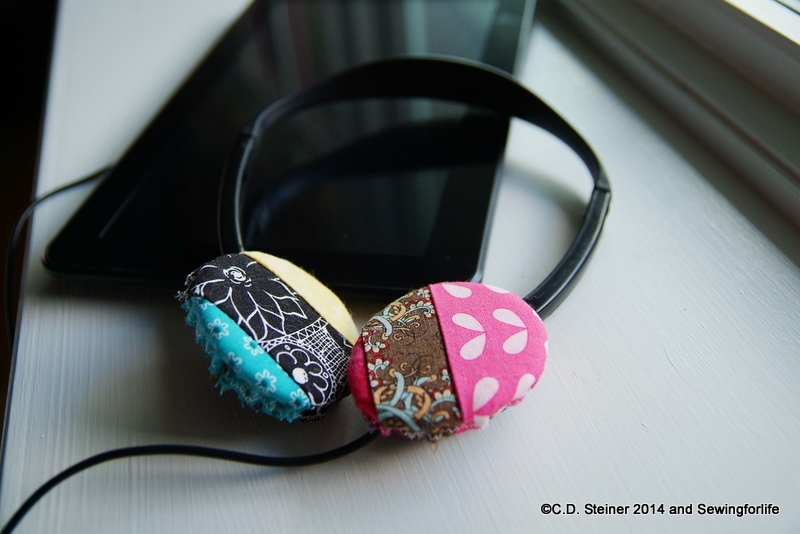
I’m old school. I have tried ear buds and other ear pieces but to my dismay, those usually hurt my ears. Jim has some super monster noise cancelling headphones that are very comfortable but are REALLY BIG. Great for the airplane but not so great if you want to go for a walk and listen to the radio or music…big and bulky on the head plus when you are outside you want to hear SOME noise around you…just to be safe.
So I have these headphones but over time the spongy covers have all but disintegrated or have fallen off.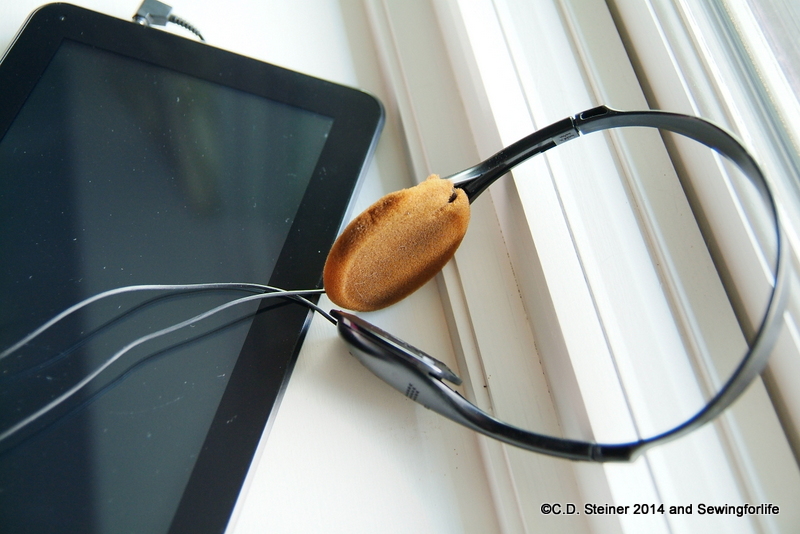
Over time this foam just goes bad…
…probably not what you want up next to your ear anyway.
To make replacements you’ll need the following:
1. Paper
2. Pencil or marker
3. . Thread
4. Scissors
5. Sewing machine, properly threaded with a size 10-12 needle, preferably a machine with zig zag as that is what I’ll be demonstrating. (though you could improvise if needed if you wanted to do this by hand or with a straight stitch)
6. Hand sewing needle
7. Scrap fabric
8. Scrap piece of cotton batting (other batting would work too but try to stick with natural fibers and low or medium loft, not of that 2 inch foam!)
Ready? Let’s begin!
Step 1: Trace the outline of the earpiece. 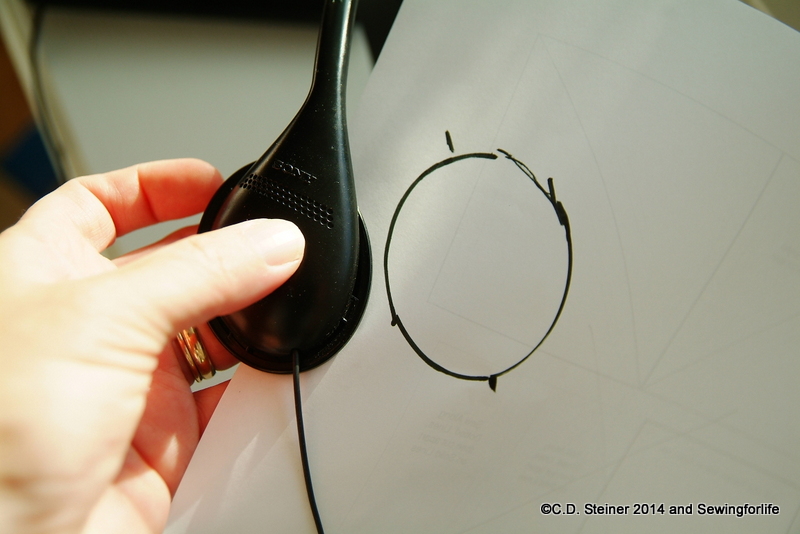
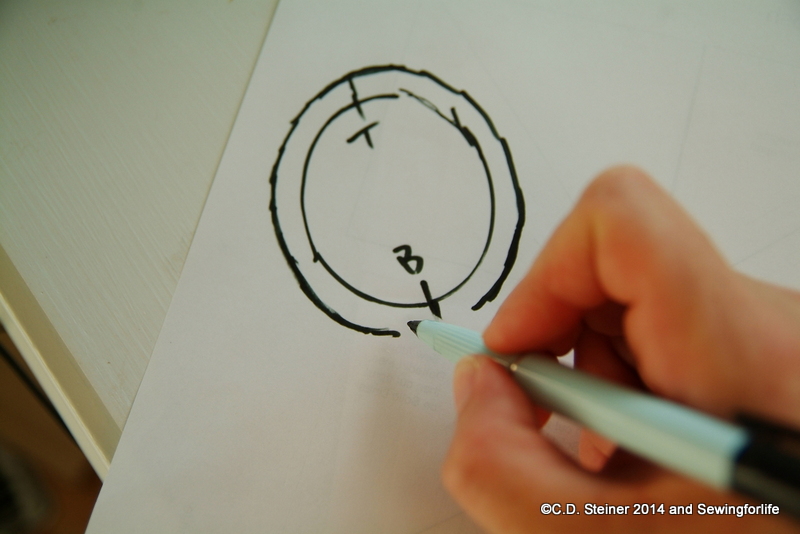
Step 2: Draw an extension, this is about 1/2″, or enough to turn back over the edge of your earphone…
…mark some placement markings. I marked a T for Top and a B for bottom. Cut our your pattern…
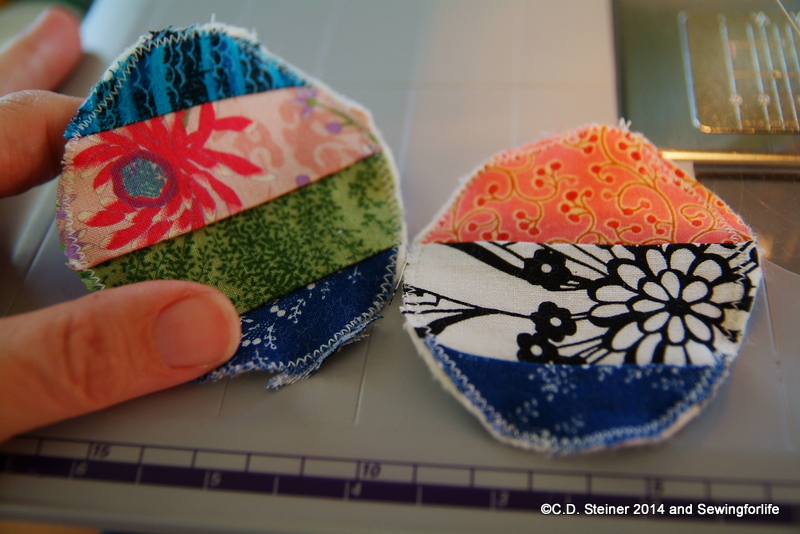
Step 3: Layer your batting, your scrap piece of fabric and your pattern and cut two…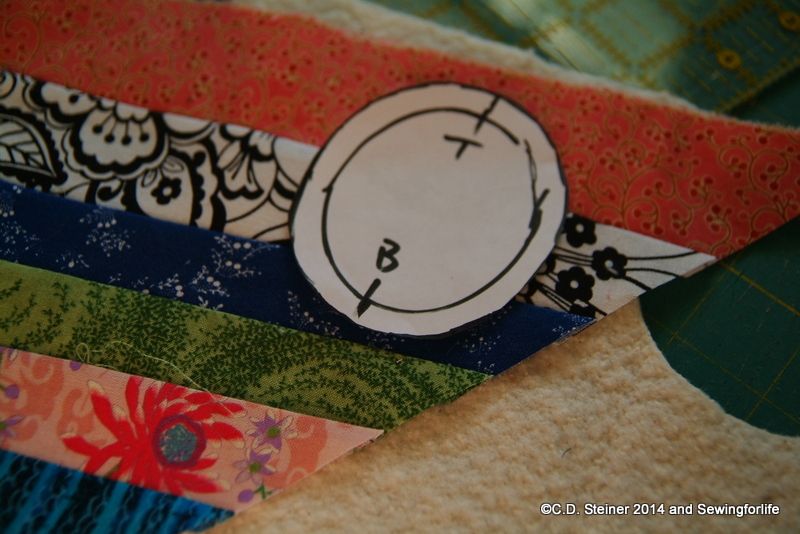
I transferred my markings onto the batting…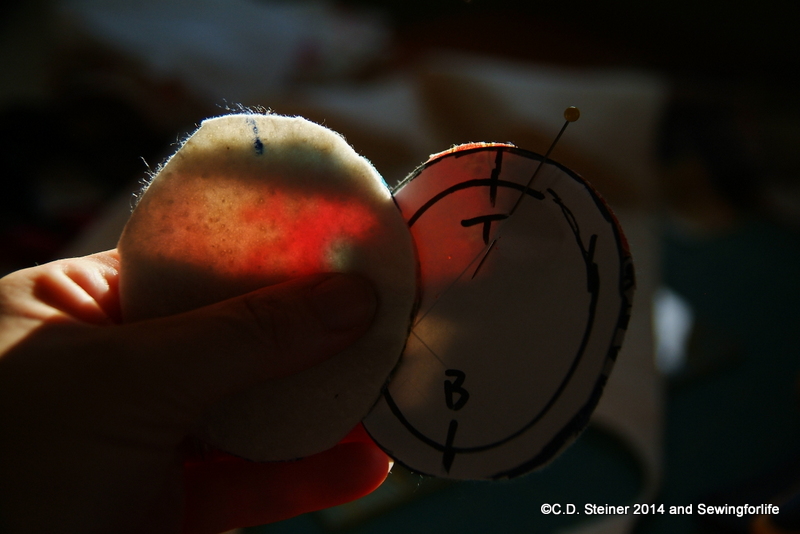
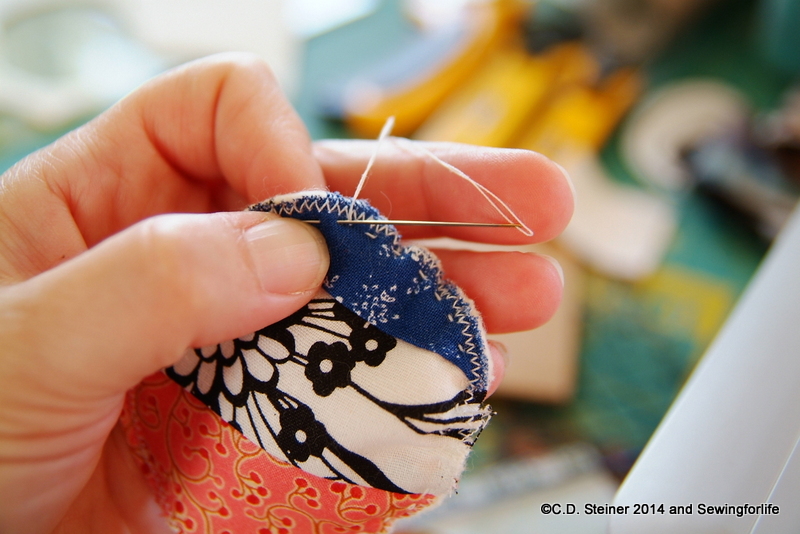
Step 4: Sew a zig zag around the outer edge of the earphone pads.
First I set up my machine. Stitch length at 1, width of zig zag at 1-1/2…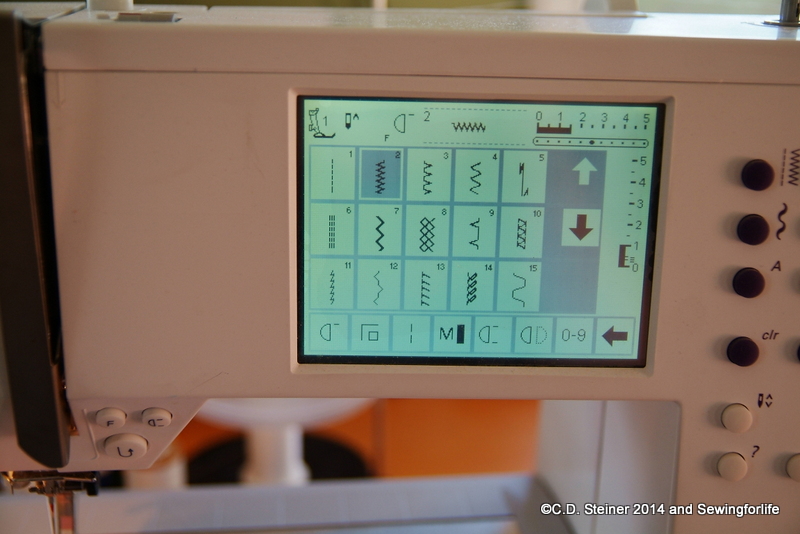
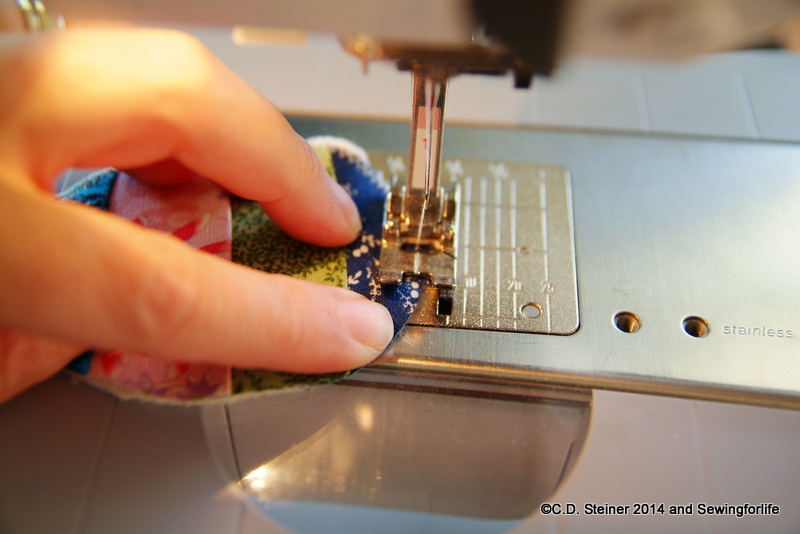
…sew all around the discs…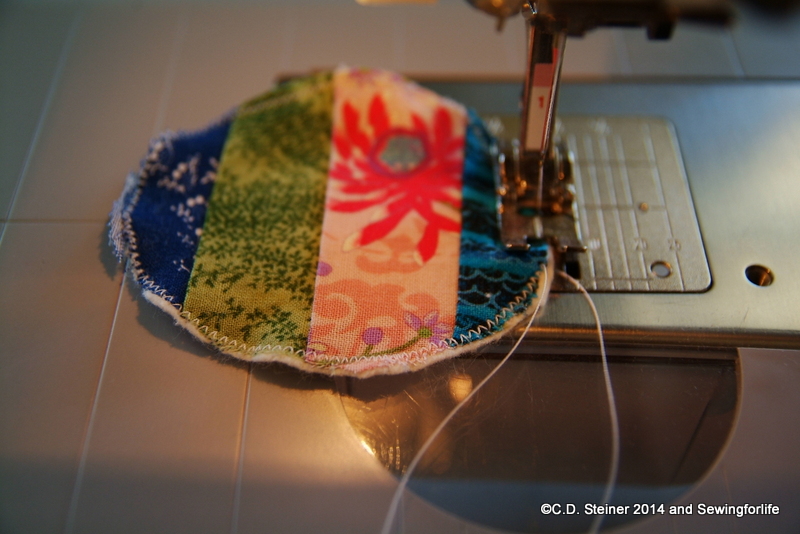
Step 5: Hand gather the pads.
Cut a piece of thread about 25 inches in length. Thread it through a hand sewing needle and double it up. Tie a knot including both threads…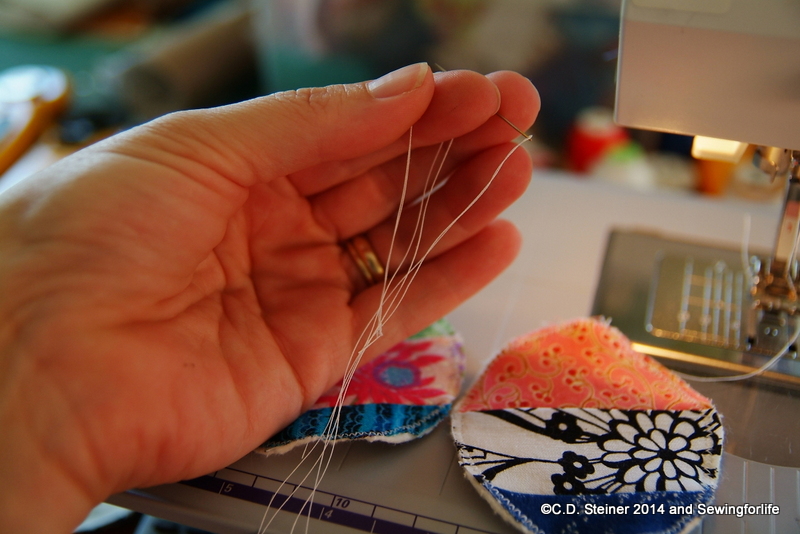
…inserting the needle from back to front. This will bury the knot to the inside… 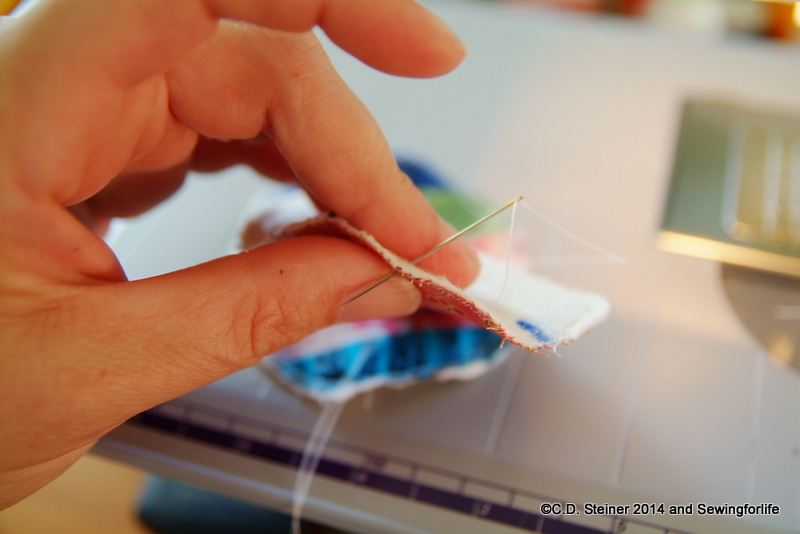
…and sew a running stitch around the pad. The stitches are not that small, you want them big enough so you can pull the threads to gather in the pads.
Start gathering in the pad. Just pull on the thread and ease in the gathers around the edge.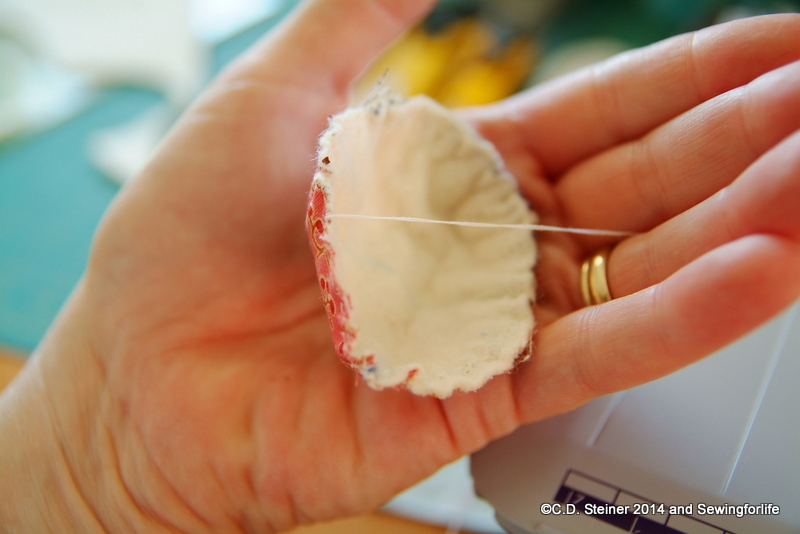
Step 6: Attaching the pad to the earphone.
Match up your markings and patiently work the pad around the earphone. You’ll pull tightly on the threads…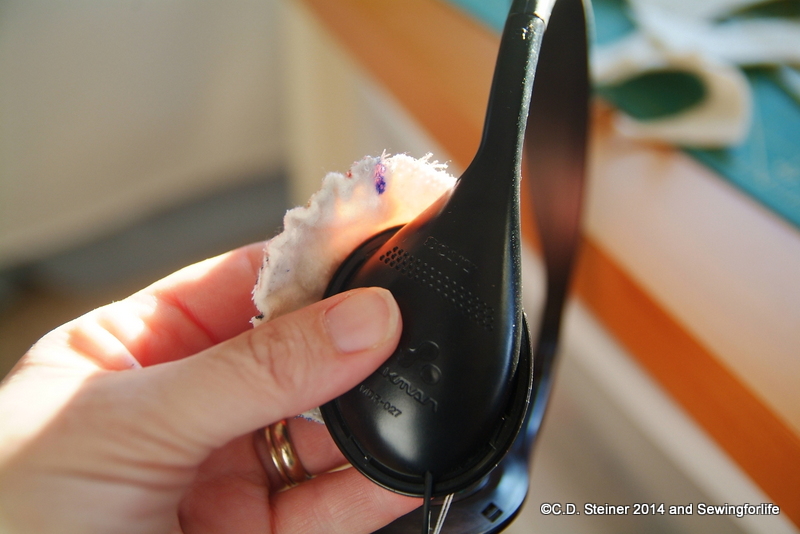
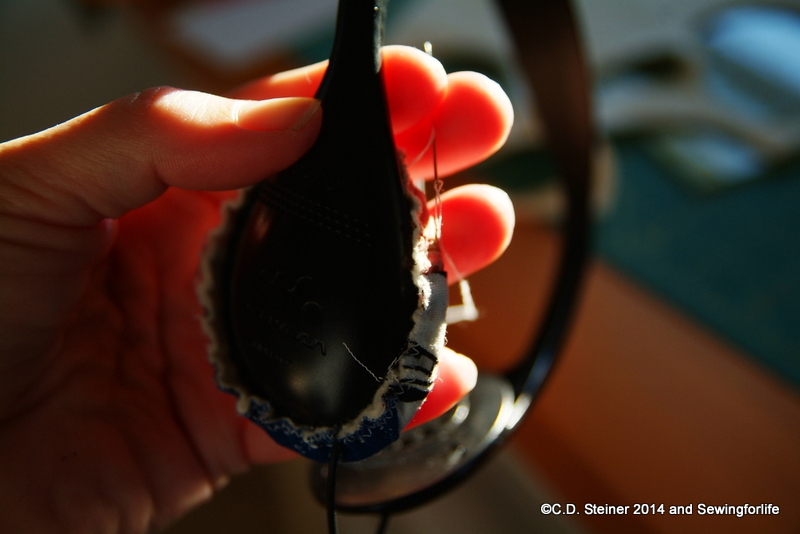
Tie a knot and cut the threads.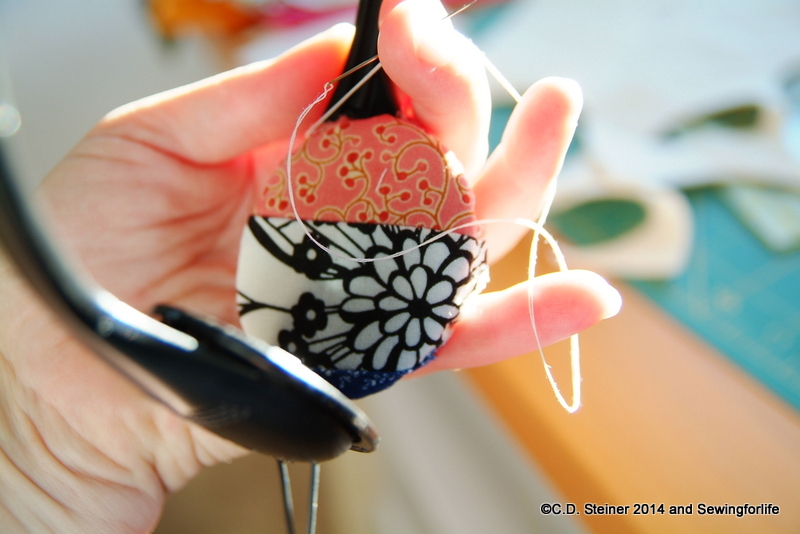
If needed (I did on these earphones) run a second line of gathering stitches to snug the fit (I ran a second set of stitches on one side of the pads), knot and clip the threads!
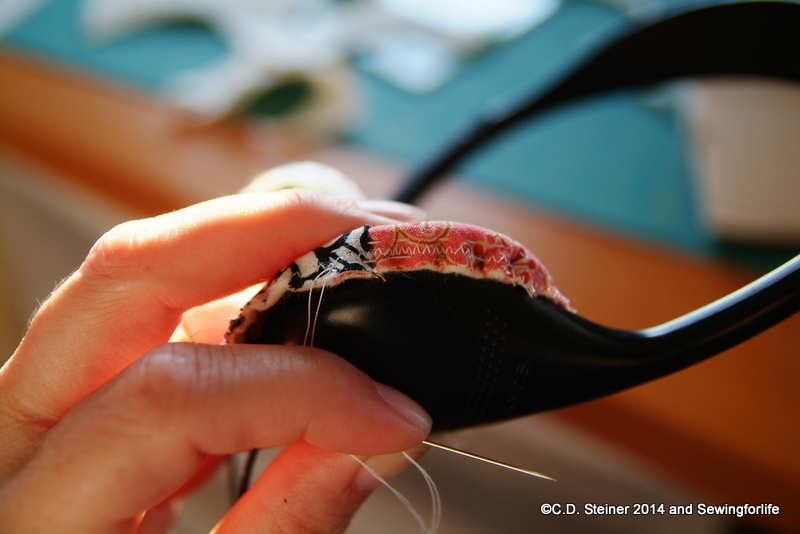
Viola! Check the fit and you’re ready to rock!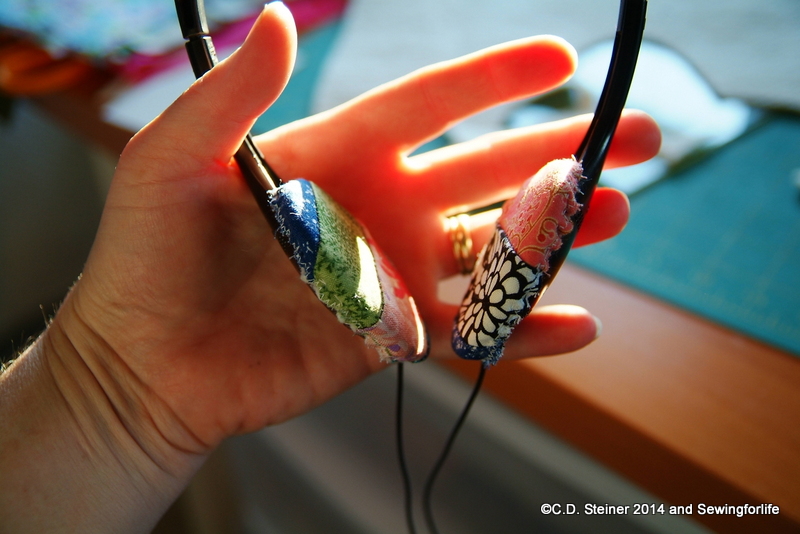
The great part about these pads is they can be made with whatever fabric you want. If you want to use scrap like me…great! If you want to fussy cut something cute, awesome! If you want to make an itsy quilt block, even better!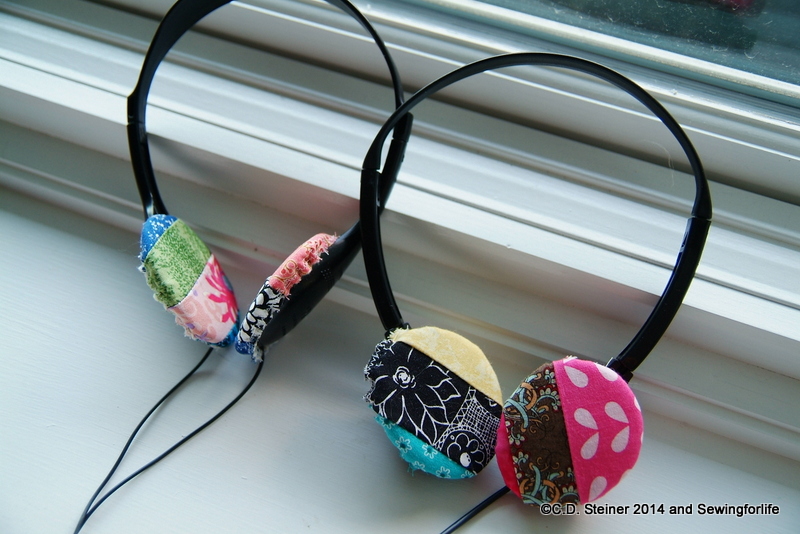
Enjoy!
Happy Sewing!
~Cathy

Inside the top ten of my favourite posts, thankyou!
LikeLike